Apps in Sandboxes
This article explains how to use Apps in sandboxes. For additional information, see Apps Overview.
In this article:
View Apps
To view Apps:
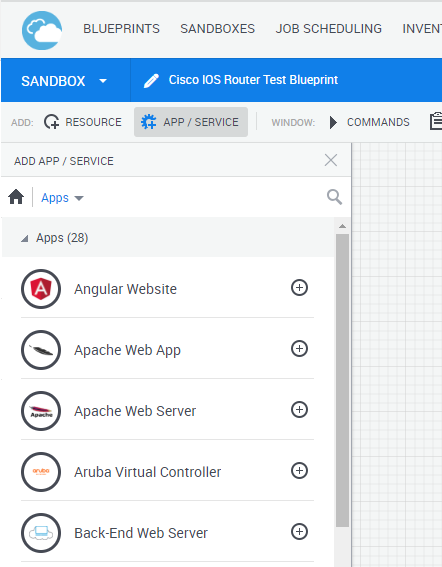
In the Diagram view, in the toolbar, click Add App / Service
The Add App / Service pane is displayed.
Browse the catalog by selecting an Apps folder or by using the text search.
The list of folders is displayed, grouped by the App families.
Add Apps
Note: For Apps connected to a subnet, all Apps in the same subnet must use the same cloud provider resource.
To add an App to the diagram:
- In the blueprint or sandbox workspace, click App / Service.
- In the Add App / Service pane, click the ‘+’ icon of the App or drag it from the pane into the diagram.

If the App has multiple deployment options in this domain, the Select Deployment Path window is displayed, prompting you to select the deployment option to use. For example:
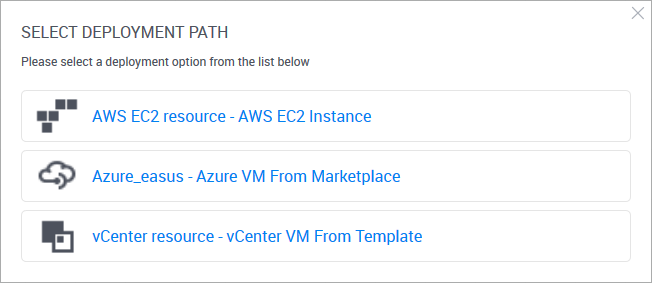
The App is added to the diagram.
Edit Apps
This action requires admin permissions.
Note: For Apps connected to a subnet, all Apps in the same subnet must use the same cloud provider resource.
To change an App's deployment path in the diagram:
- Open the diagram.
- Hover over the App. From the context menu, select Change deployment.
To edit an App in the diagram:
- Open the diagram.
Hover over the App. From the context menu, select the Edit option.
The App dialog box is displayed.
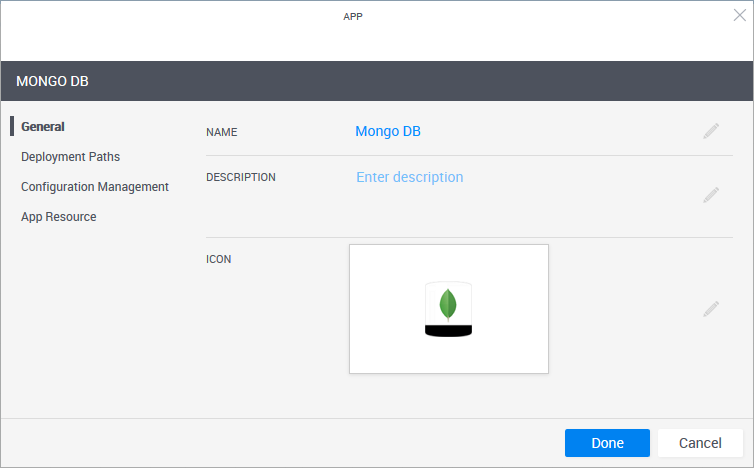
In the General page, you can edit the App's Name, Description and Icon.
Note: The App's name has a limit of 100 characters and can only contain alpha-numeric characters, spaces, and the following characters: | . - _ ] [
In the Deployment Paths page, you can change the settings of the virtual machine to be deployed.
- Select which deployment path to use. Note that only deployment paths that are based on cloud provider resources in your domain are displayed.
- Additional deployment settings are provided depending on the deployment path you selected, but you need to be an admin to edit them.
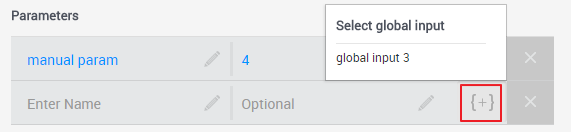
In the Configuration Management page, you can add, remove and configure the parameter values to be used by the configuration management tool.
If the blueprint has global inputs, you can also set the parameter to receive the value that the sandbox end-user specifies for a global input when reserving a sandbox containing the App. To do this, enter a meaningful name for the parameter, click the parameter's "{+}" button and select the global input. The global input is displayed in the parameter's value, surrounded by curly brackets "{}". In the image below, the App's blueprint has a global input called "global input 3":
- In the App Resource page, you can select a different Shell for the deployed App.
- Click Done.
Run App commands
These commands are available for VMs deployed by CloudShell (Apps) and for static VM resources that were added to the CloudShell inventory.
Note: Some commands, like Refresh IP, do not apply to static VMs.
To run an App command:
- In a sandbox diagram, select the required App.
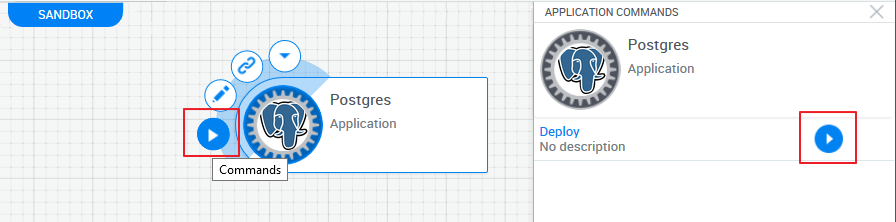
Hover over the App. From the context menu, select Commands.
The Application Commands pane is displayed, listing the commands available for this App.
Click the Deploy command.
The App deploys the VM and installs the specified application in it. When App deployment completes, an "active" live status icon (
 ) is displayed on the App and additional commands become available.
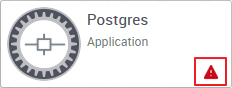
If App deployment fails, an "error" live status icon is displayed on the App. Hover over the icon to see the error's description.
The following commands are provided by default for deployed Apps:
Power On: Deploys the App (deploys the virtual machine and installs the specified application).
Once deployed, the App changes to a resource modeled after the Shell specified for the App, and receives the IP address of the deployed virtual machine.
Refresh IP: Releases and renews the VM's IP address to troubleshoot network connection issues.
Power Off: Shuts down the App's virtual machine but does not remove it from the sandbox.
Notes:- Apps are designed to be used in the context of a sandbox. Therefore, when the sandbox ends, the deployed Apps should be deleted and their virtual machines powered off. CloudShell provides an orchestration script that does this during the Teardown process of the sandbox. For additional information, see Configure Blueprint Orchestration.
- Deleting a deployed App from the sandbox will power off the App's VM and delete the VM from the cloud provider. For additional information, see the Delete Apps below.
- Save to Template: Update the App template with the current settings of the App.
- Save Snapshot: (For vCenter Apps) Creates a snapshot of the App's VM, saving the state of the VM's hard disc, including software and configurations. To also save the VM's RAM memory, including open windows and running processes, set Save Memory to Yes. Snapshots are available for use on the deployed App in the same sandbox only.
- Restore Snapshot: (For vCenter Apps) Reverts the App's VM to a previously saved snapshot.
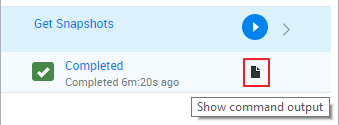
Get Snapshots: (For vCenter Apps) Displays a list of the App's snapshots. To see the list, click the command execution’s Show command output button.
Activity Feed for an App in the sandbox
The Activity Feed pane enables you to display system messages and command execution progress for a specific App in the sandbox.
For information about the activity feed for a resource or service in the sandbox, see Activity Feed for a Resource in the Sandbox and Activity Feed for a service in the sandbox, respectively.
To open a component's Activity Feed:
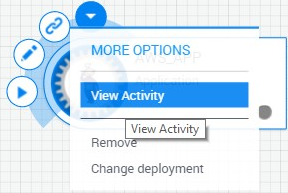
- In the sandbox, click the component's live status icon. Alternatively, hover over the component and from the Actions menu, select View Activity.
The Activity Feed pane is displayed, listing the last 30 entries.
Tip: Scroll to the bottom to display additional entries.
- To change the time format of the entries, click the
 button. By default, the time elapsed is displayed for each entry.
 To narrow down your search for entries, use the search and filtering options. Click the
 button to show the filters.
Note that the search and filters apply to all entries in the Activity Feed, not just the last 30.
- Search feed field: search for entries that include a word or phrase.
- Error option: display errors that occurred in the sandbox
- Has output option: display entries that have an output
- Component drop down list: display entries that are related to a specific resource, App or service in the sandbox. The value Component displays entries for all components.
- Event type drop down list: display entries of a specific type. Values are: Event type (all entries), Command, Resource, Service and Sandbox.
For more detailed information about a particular error, see Activity Feed Pane.
View App's VM details
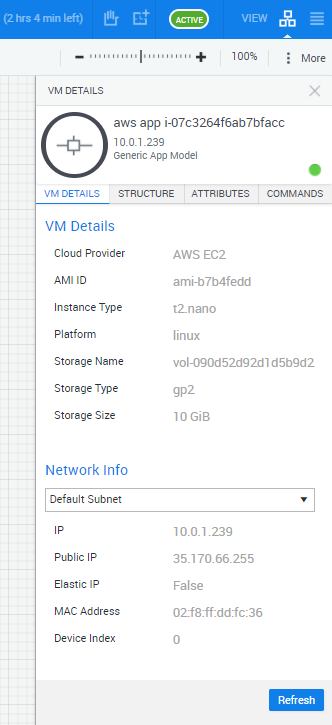
The VM Details pane displays the App's general information, including the cloud provider that deployed the VM, image ID, VM type and the VM's OS, as well as details about the VM's network, including public IP and the NIC's MAC address.
To open the VM Details tab:
- Open the sandbox diagram.
Hover over a deployed App. From the context menu, select the View VM Details option.
The VM Details pane is displayed. For example, VM details for an AWS EC2 App:
Delete Apps
This procedure explains how to delete Apps from a sandbox. This action also disconnects the App's connections to other components, removes the deployed App from the inventory, powers off the App's virtual machine (VM) and deletes it from the cloud provider.
Note: VM resources that were not deployed by a CloudShell App, like static VMs that were loaded into CloudShell, are not deleted from the cloud provider.
To delete an App:
- Open the sandbox diagram.
- Hover over the App. From the context menu, select the Remove option.