Labels in Blueprints
Labels enable blueprint designers to make the blueprint more readable by creating a visual layer that logically groups your blueprint's resources, Apps, and services according to some shared quality or characteristic, like "Spine Network", "Web Servers" or "Firewall". Labels are created in the blueprint and are included in the blueprint's sandboxes.
- To share labels between blueprints, use a blueprint template that includes the labels.
- Labels are only visible in Diagram view and when using the Medium Icons display mode.

Viewing labels
If any of the blueprint's components have labels, the Labels Legend is displayed at the top of the canvas, showing the labels that are currently in use.
To view the diagram's labels:
Hover over a component. From the context menu, select Labels.
The Labels menu is displayed, listing the diagram's labels.
- Optionally use the Search Label field to quickly find labels. You can search for full or partial terms or phrases.
Adding labels
This section explains how to create labels. You can make as many labels as you want, as long as each has a unique name and/or color combination.
Note: Labels are created in the blueprint, not in the sandbox.
To add a new label to a component:
- In the Labels menu, click Add New Label.
In the Add Label window, enter a Name (up to 32 characters) and select a color. For example:
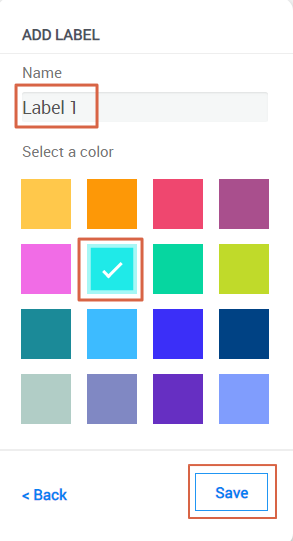
Click Save.
The new label is displayed in the labels list. You can now apply it to components in the blueprint and in the blueprint's sandboxes.
Applying labels
Select an existing label and apply it to a component.
To apply a label to a component:
In the Labels menu, select a label.
Click Apply.
Editing labels
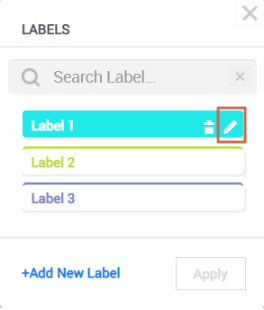
To edit a label:
In the Labels menu, hover over a label and click the Edit label in blueprint button.
- In the Edit Label window, specify the new Name and/or color.
- Click Save.
- In the Labels menu, select the new label and click Apply.
Removing labels
To remove a label from a component:
In the Labels menu, click the label in the list to deselect it.
Click Apply.
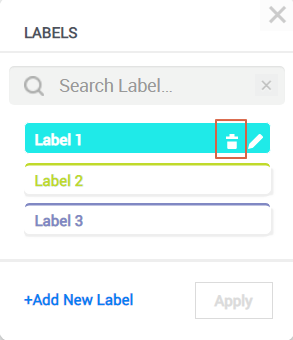
To completely remove a label from a blueprint:
In the Labels menu, hover over the label and click the Remove label from blueprint button.
- Click Yes in the confirmation window.
- Close the Labels menu.
- Note: This action removes the label from all other components that are using it in the blueprint.