Running AdHoc Automation Suites
Ad hoc automation suites can be used to define and execute an automation suite on the fly. Ad hoc suites are intended for one time use and therefore do not have recurrence settings or the capability to publish inputs. The job and test results are saved in the ad hoc automation suite's execution history, but the ad hoc suite's settings are not saved and cannot be reused.
Note: Regular users who are permitted to access a test can run it as part of an ad hoc suite. The test is not visible to users who are not permitted to view and run it. For information about adding permitted users to a test, see Adding users and groups to a test.
To add an ad hoc automation suite:
In the Executions page, in the AdHoc automation suite's row, click Run.
- In the Name field, enter a name for the suite.
- In the Description field, enter a description for the suite.
- To add a job to the suite, click
 .
. - In the Name field, enter a name for the job.
- In the Description field, enter a description for the job.
- In the Blueprint field, click
 . In the Select blueprint pane, select the required blueprint and click Done. Optionally, enter default values for the blueprint's inputs, if it has any.
 - To add a test to the job, in the Tests field, click
 . In the Add a test pane, browse to the required test and click to add it.
Tests are executed sequentially, so to change the order of the tests inside your job, click, next to the test name click  and drag the test to the required location.
 - For each test in the job, enter the duration (in minutes).
Optionally, enter default values for the test's input fields if it has any. Multiline values are supported for test input string attributes, as explained in Add tests to a job.
- To edit the duration of the job, in the Duration field, click
 .
. To define the job's execution settings, in the required job row, click
.Execution Servers Select the execution server(s) that will run the job's tests:
- Specific: Select a specific execution server. If needed you can select more than one execution server.
- Any: The execution server is selected automatically by availability
Reporting Profile Determine what will be written to the execution report:
- None: Test results (passed/ failed/ completed/ error/ terminated) and measurements attributes
- Results: Test results (passed/ failed/ completed/ error/ terminated) and measurements attributes
- Measurements and Results: Test results (passed/ failed/ completed/ error/ terminated), transformations, text to report, measurement attributes, and captured image
- All: Every input received by the test and output sent during the test
Stop On Determine when the job will stop:
- Fail: The job will stop running when a test fails
- Error: The job will stop running when an error occurs or if the test encounters an error.
Tab Action to perform
Instruction
Calculated tab
Update the job duration buffer
In the Set buffer (minutes) field, enter the required value.
Specific tab
Enter the job duration manually
Enter the amount of time required for the job execution.
- In the Name field, enter a name for the job.
- To add additional jobs to the suite, repeat the last step.
- To define the email notification you wish to receive for the suite, click the Email Notifications field and select one of the following options:
- When the first job in the suite started to run and the last job in the suite completed the run.
- If an error occurred while trying to run the suite or any of the jobs it consists of.
- When the first job in the suite started to run and the last job in the suite completed the run.
- If an error occurred while trying to run the suite or any of the jobs it consists of.
- When each job within the suite started running and completed its run.
- To define advanced scheduling options for the suite, in the Advanced field, click
 and select a suitable option:
 To view or edit the published input fields, in the User Inputs field, click
and edit the required field. 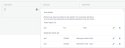
- To delete a job from the suite, in the job’s row, click
 .
. Click Run.
The suite is added to the queue and will run as soon as an appropriate execution server and the blueprint's resources (if a blueprint was defined) are available for the duration of the automation suite's jobs.
For details about suite results and reports, see Viewing Test, Job and Suite Execution Results and Viewing Execution History and Test Reports.
None | No notification will be sent. |
Errors Only | Notifications will be sent if an error occurs while trying to run the suite within the suite. Test failure does not prompt an email notification. |
Suite and Errors | Notifications will be sent: |
All | Notifications will be sent: |
| Remove old jobs from queue | Define timeout for the suite. Jobs will be automatically removed from the queue upon time-out. |
| Set specific timeframe | Define a specific start and end time for the suite. |
| End Sandbox when Job fails | Select this option to end sandboxes automatically when the job fails. |
