Add User Inputs
In this article:
Blueprint inputs appear to the user as a form they will need to fill out prior to using a blueprint. The image below provides an example of what this form looks like:
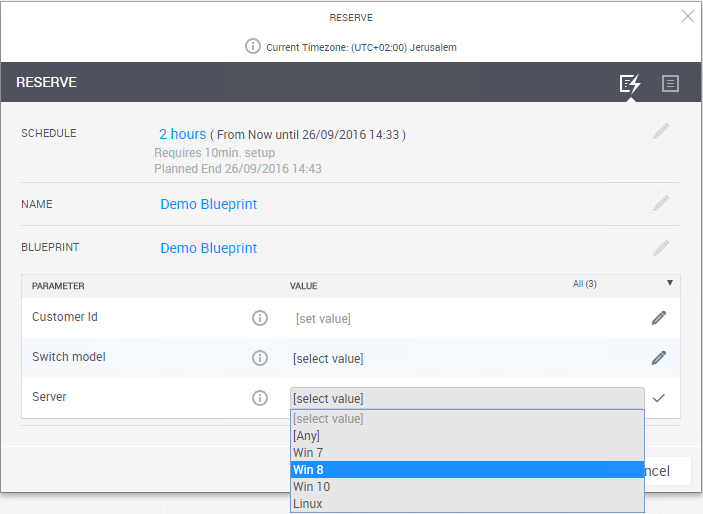
Defining blueprint user inputs
Blueprint inputs can be used for resource selection (if the blueprint contains abstract resource requirements), as additional information to drive the provisioning, or as general information to be collected from the user.
To edit a blueprint’s inputs:
From the Blueprint menu, click Properties.
The Edit Blueprint page is displayed.
Click the Inputs button in the page header.
The inputs area is displayed.
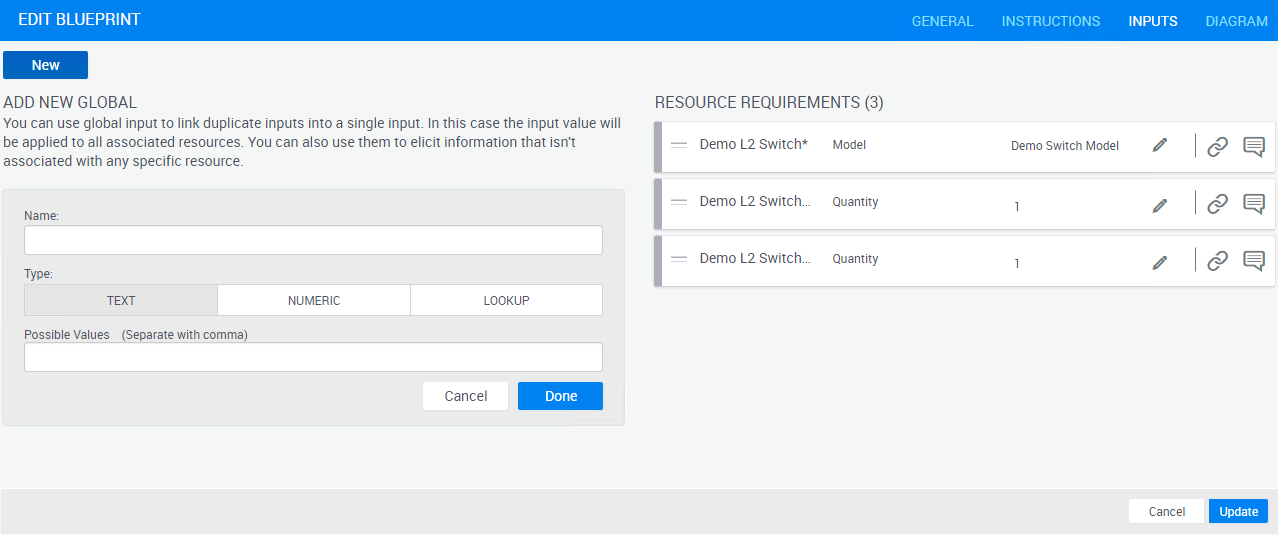
Global inputs
Global inputs are a simple way to request information from the user when they reserve the blueprint. You can create a global input of one of three types: Text, numeric or attribute. It is possible to restrict the possible values by typing in a comma separated list. In that case, the user will get a dropdown list and will only be able to choose one of the possible values.
- Text inputs will accept any textual input from the user.
- A numeric input will restrict the user to enter a number. The number has to be a whole number (not a fracture).
- A lookup input is linked to a specific lookup attribute defined in the system.
Resource requirements and additional info
Some blueprint inputs are directly related to resource requirements and information that are defined as user inputs. These inputs are displayed in the right hand section of this page. If you have abstract resource templates in your blueprint, and those templates have inputs, they will be listed here. For additional information about setting inputs for blueprint resources, see Add Abstract Resources.
Grouping together resource requirements and information
As the blueprint accumulates more required user inputs, it may become necessary to group some of them together into a single entry. One example would be if there are numerous switches in the blueprint, which all have their model set as an input. In some scenarios, the blueprint designer might want the user to feed in just one value 'Switch model' and have that value affect all relevant resources. To do so, use the 'Link inputs' icon displayed next to each resource requirement or information input.
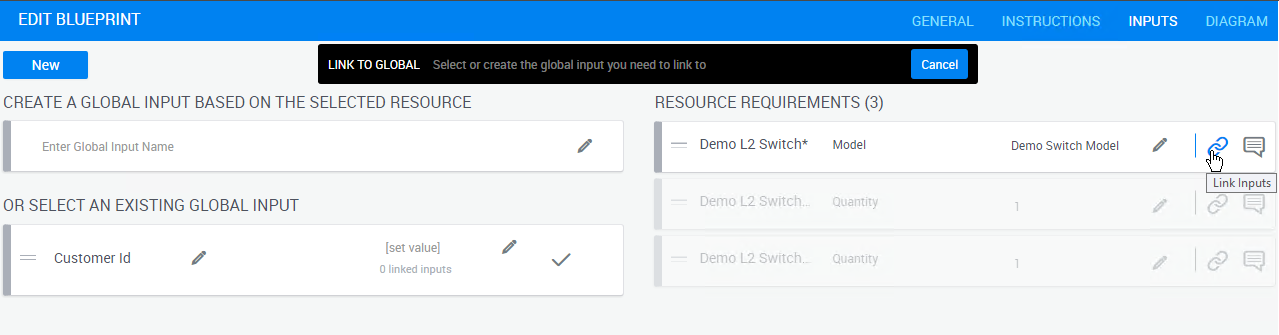
After clicking the 'link attribute' button you will be able to choose whether to link to an existing global attribute or create a new one. Once the attribute is linked, you will see the global input appearing as a tag on the input you've linked. Once an input is linked to a global input it will no longer appear to users reserving the blueprint and will be set only via the input it is linked to.
Note: Abstract resource attributes with partial or search conditions, which use a non-equals action, cannot be linked to global inputs.
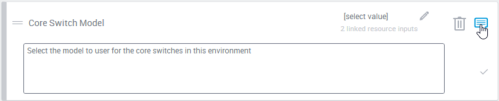
Adding description and default values for blueprint inputs
For each input defined for the blueprint, it is possible to set a default value, which will be displayed to the user reserving the blueprint. To include a description for each input, click the add description button and enter the description in the text area that will appear inside the input box. The description is provided as a tooltip in the blueprint's Reserve form.
Linking published attributes to global attributes
You can link a published attribute to a global attribute. When the value of the global attribute is specified, all the individual attributes are populated with the same value, eliminating the need to open each one and specifying the values for reach individual attribute separately.
To link a published attribute to a global attribute:
Open the blueprint's inputs page.
In the row of the attribute that you want to publish, click the Link Inputs button
 .
.
You are prompted to select the global input that must be linked to the selected published attribute.

Select the required global input. If it does not exist, specify the name of the global input in the Enter Global Input Name field.

You can optionally modify the global input using the following fields:
Field Description Attribute value Value that is applied to all the published attributes that are linked to this Global Input. Delete Global Input Delete the selected Global Input. Edit Global Input Description Modify the text that describes the selected Global Input,. Click Update.
The Blueprint Catalog is displayed.